Preface
This quick blog post is about my weekend project from last Saturday. To start with I have bought a Pineapple Mark V from the hak5 shop. The Wi-Fi Pineapple is a special Wi-Fi access point, designed for wireless network auditing with custom, purpose built hardware and software with the capability for extensions. You could make something like this on your own, but the Pineapple has everything pre-configured, so it makes a pentester's life a lot easier.
The basic problem was that the "standard" version of the Pineapple Mark V ships with a wall plug only. When you perform a wireless or mobile pentest, usually you do not have the luxury to have a wall plug, so either you will need a battery package or feed your cure little Pineapple from you laptop.
The basic problem was that the "standard" version of the Pineapple Mark V ships with a wall plug only. When you perform a wireless or mobile pentest, usually you do not have the luxury to have a wall plug, so either you will need a battery package or feed your cure little Pineapple from you laptop.
I have ordered a Pineapple Juice 6800, but the one I got is not charging and even the replacement one I got from the hakshop (big up to the hak5 guys for that one!) does not work either :( (I will try to fix at least one of them later). The USB power cable that you can buy from the hakshop is currently out of stock, but don't be sad, cause it won't work whit the Mark V anyway, as the Mark V need "DC in Variable 5-12V, ~1A" for input while for USB the supplied output by a host (for example a common laptop USB port) is usually around 5V at 500mA (so 0.5A).
The voltage level will not be a problem with a USB cable (although I am not sure how well for example a USB flash drive would work when you power the Mark V from USB... something I have to test in the future) the current level will not be enough to power the Pineapple. Luckily, Kirchhoff's first law tells us that if we connect 2 wires with 0.5Amps, than the wire leaving the junction should have 1A, which is exactly what we need. :)
The problem is that it is not easy to find a cable with USB Y connector to DC barrel connector, so I took a USB Y cable for a USB 3.0 external HDD, and a USB power cable with a DC barrel connector, and soldered them together to give enough power for my dear little Pineapple Mark V.
Parts Needed
- A USB Y cable, so the one with two USB connectors at one end and whatever on the other end. Usually external HDD cables are like this, to ensure that you support enough juice for the HDD from the USB port.
- A cable with a DC barrel 2.1mm ID / 5.5mm OD, center positive connector on one and whatever on the other end :) For example, I got this USB cable from Amazon.
- Some heat sink tube in order to give a nice look to your final product. You can buy a nice heat sink kit from Sparkfun for example.
Tools needed
- Flush/diagonal cutters (for cutting the wires)
- Solder (for soldering, of course)
- Soldering iron (yep, this one is also for soldering)
- Hot air solder station (for the heat sink tubes)
- Third hand with Magnifying Glass (you're gonna need it, otherwise you will have to grow a third hand :) )
- Good light (no, seriously, this is really important when you solder something!)
Assembly
As soldering wires together is not rocket science, I will basically use the pictures I took to explain what you will have to do.
So here I have my USB Y cable for a USB 3.0 external HDD:

You will have to cut the wire into half, as we need the USB Y end of it. Wires in a USB cable should be color coded, for the USB 2.0 wires, these are: red = VCC, white = D-, green = D+ and black = GND. More on the USB pinouts here.

For me, as I used a USB 3.0 cable, there were two extra shielded twisted pairs:

These are the USB 3.0 additional data cables, also color coded (pinouts here and here), but we won't need them, so never mind these:

Next, my USB power cable with a DC barrel connector:
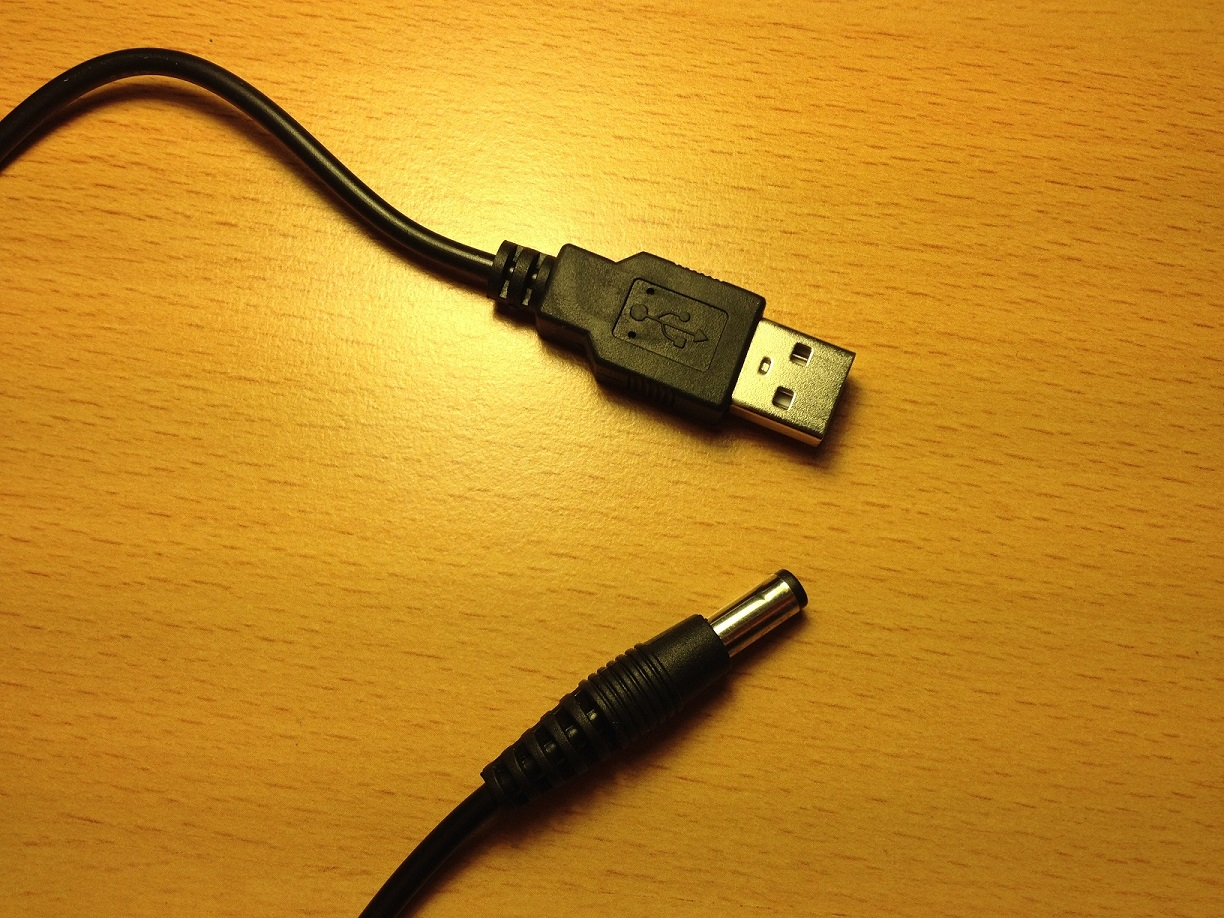
Nothing magical here, again, we only need the red and black (VCC and GND) wires and this time the DC barrel connector end of the cable:

Before soldering, it is a good idea to test the concept and see if it works:

Looks OK. Now to make a nicely looking cable, I used heat sink tubes, but if you don't care about the looks, you can use insulating tape too:

One final check after the soldering but before the heat sink tubes:

Again, looking good, so first small heat sinks for the wires:

And a heat sink for the cable:

The final test. Works perfectly! (if you are wondering, the keyboard layout is Hungarian...)

Conclusion
The whole process takes about 30-40 mins and requires minimal soldering skills, so you really have no excuse not to do it yourself if you want to power your Pineapple Mark V from USB and like I wrote at the beginning, you don't really have other option as you cannot find such a cable out there.
Comments
Post a Comment