When you encounter data loss of your Android phones or tablets, just use
Android Data Recovery.
Android Data Recovery supports almost all Android phones, including Blackberry, Samsung, Nokia, LG, BenQ, Siemens, Fujitsu, CECT, Kyocera, Mitsubishi Electric, Panasonic, NEC, Palm, Pantech Wireless Inc., Philips, Qualcomm Inc., Sagem, Sanyo, Sharp, Sierra Wireless, Just5, SK Teletech, T&A Alcatel, Trium, Toshiba, and Vidalco.
 |
| Recover Lost Data to Android |
Therefore, Android Data Recovery is easy-to-use
Android Data Recovery Software. The software can effectively
recover deleted or lost photos, music, video, and multimedia files from almost all Android phones after disasters like erroneous deletion, corruption or formatting errors, etc.
Here is a free trial version app for you. Be sure to choose the right one for your computer.


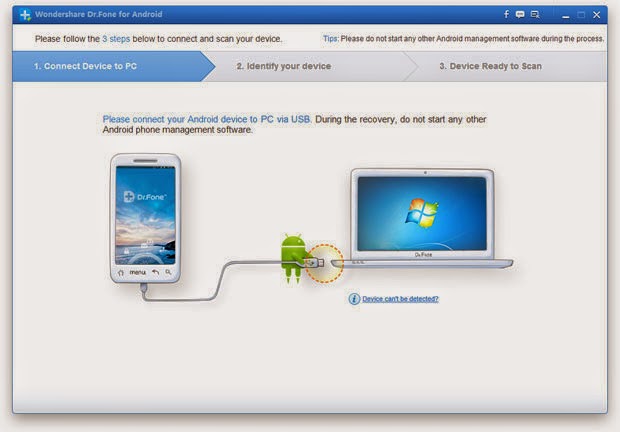
How to Recover Lost Data to AndroidStep1. Connect your device to PCAfter launching Android Data Recovery, you'll get the primary window below. Please connect your Android device to the computer via a USB cable.
 |
| Recover Lost Data to Android |
Note: You'd better connect one device at a time, and make sure your Android phone is available for Android Data Recovery.
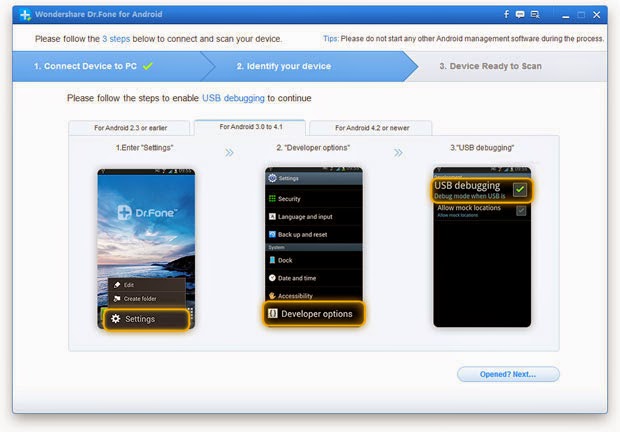
Step2. Enable USB debuggingNow you need to enable USB debugging on your device. Follow the detailed expression in the window to set it now.
1) For Android 2.3 or earlier: Enter "Settings" < Click "Applications" < Click "Development" < Check "USB debugging"
 |
| Recover Lost Data to Android |
2) For Android 3.0 to 4.1: Enter "Settings" < Click "Developer options" < Check "USB debugging"
 |
| Recover Lost Data to Android |
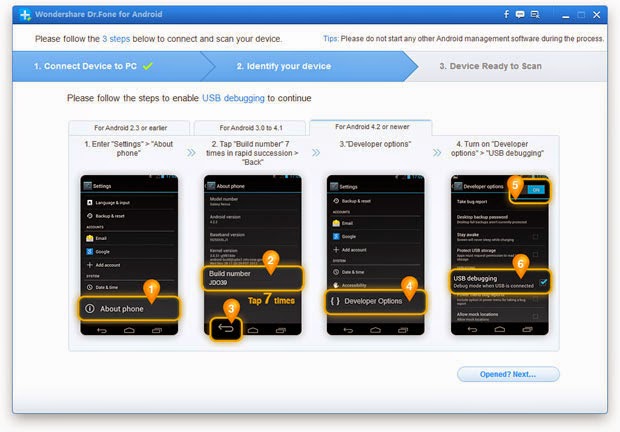
3) For Android 4.2 or newer: Enter "Settings" < Click "About Phone" < Tap "Build number" for several times until getting a note "You are under developer mode" < Back to "Settings" < Click "Developer options" < Check "USB debugging'
 |
| Recover Lost Data to Android |
Note: If you have enabled USB debugging on your device before, you can skip this step.
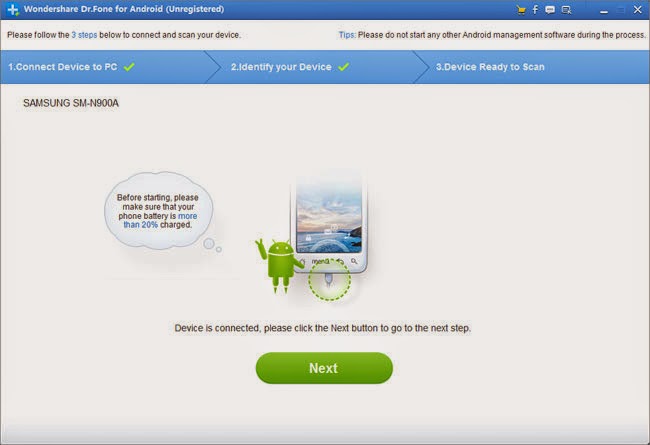
Step3. Begin to analyzing the data on your deviceAfter you get the USB debugging down, the program begins to connect your device. Click "Start" to analyze the data on your device.
 |
| Recover Lost Data to Android |
Note: Before starting, please make sure that the battery is more than 20%, to ensure a complete scan.
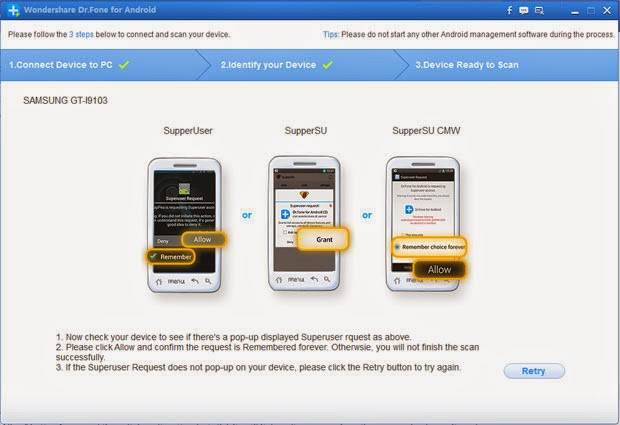
After your device is detected, you need to allow the program super user authorization on the screen of your device. Just click "Allow" when the message pops out on your device’s screen.
 |
| Recover Lost Data to Android |
Note: If the program doesn't scan anything for a long time after you clicked "Allow" on your phone, please check your phone again. Some devices present the "Allow" button for several times. It doesn't matter. Just click it until it doesn't appear again or the program has begun its real scan.
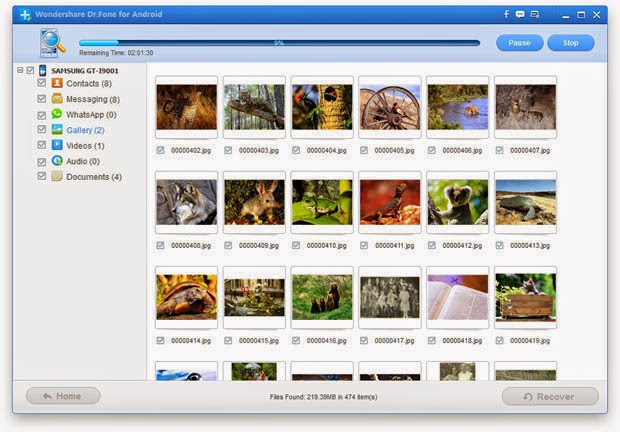
Step4. Ready to scan your device for data on it
Now your device has been successfully detected. Click "Start" to scan it. Do not disconnect your device during the scan, or the scan will fail.
 |
| Recover Lost Data to Android |
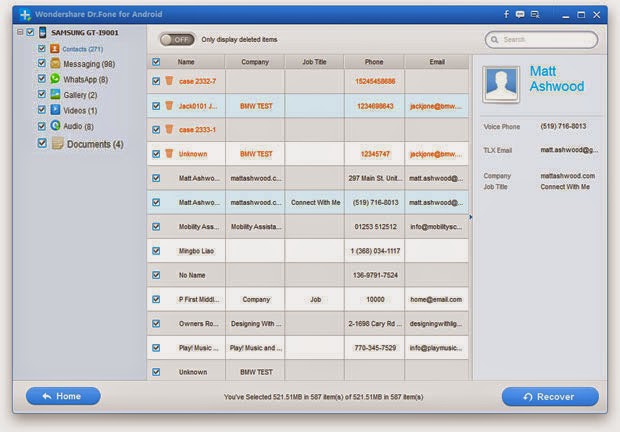
Step5. Preview and recoverThe scan will take you a while. After that, you can preview all recoverable data found in the scan result one by one. Actually, the current messages, contacts, photos and video are also scanned out in the result. Deleted SMS and contacts are shown in red. You can separate them by the color.
After preview, mark those you want and click "Recover" to save them on your computer. As to contacts, you can save them in CSV, vCard or HTML format; to messages, save them in CSV or HTML format.
 |
Recover Lost Data to Android
|
Read more:
Comments
Post a Comment