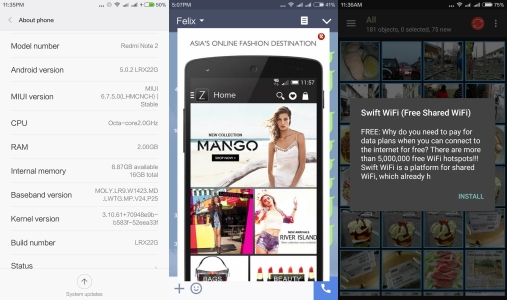
This is my journey getting a Redmi Note 2, currently meant for the China with a Chinese version ROM pre-installed with Mi App Store instead of Google Play Store in place. Feels rather handicap without the convenience of Google Play and getting most of the Google apps. My Redmi Note 2 was pre-loaded with Stable ROM (MIUI6) Version: V6.7.5.0LHMCNCH and bundled with annoying Bloatware.

No worries. Here, I will share how to get out of the frustration. After reading numerous tutorials and forums, and making sense out of them.
There are a few methods of doing it, this being the simplest. I will be sharing more in time to come after having a hands-on experience and making sure they work with reliability and safe as not to FC your new phone.
IMPORTANT: Before even going any further, please make sure you enable your settings for installing a 3rd party APK files. READ my tutorial on installing APK at this link:
NOTE: First thing first, since the device is running on a STABLE ROM, hence you will not have access to “ROOT” the phone. To be able to have a ROOT privilege, you need to install at least a Beta ROM or DEVELOPER ROM. Otherwise, apps like WinDroid Universal Android Toolkit, Root android is needed.
It is encourage that you update to Stable ROM (MIUI7) Version: V7.0.8.0.LHMCNCI which do not have the “ROOT” privilege which is Bloatware free. You could do it via OTA and install on your phone. For Computer/PC, create a “ downloaded_rom” folder, copy the Zip file into it. Transfer the “downloaded_rom” folder into the Internal Memory of your Redmi Note 2 via USB connection. Click the image below to download the latest Stable ROM :-
Should you run into "error signature failed" problem, install V7.0.6.0.LHMCNCI first, then only update to the latest version V7.0.8.0.LHMCNCI. Click the link below to get V7.0.6.0.LHMCNCI.ZIP file.
https://felixsenada.wordpress.com/2015/10/31/tools-tips-tutorials-google-play-store-for-redmi-note-2-for-dummies/
This is what you going to see after you finish updating your ROM, below.
FROM YOUR PC/COMPUTER:
1. Click the Google Installer Icon to download the “Google Installer”.
Goto to get the link. Thanks.
2. Transfer the Google Installer to the internal memory of your Redmi Note 2 via USB connection.

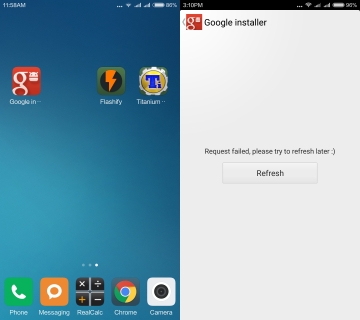
3. Just follow thru’ the sequence like the above illustration. Goto File Explorer>APKs>Google “Installer.apk”.

4. Click Google Installer icon. That will bring you in the Installer. If you do get the “Error Message” like in the illustration, try a few times and will show a list of Google Apps available to download.

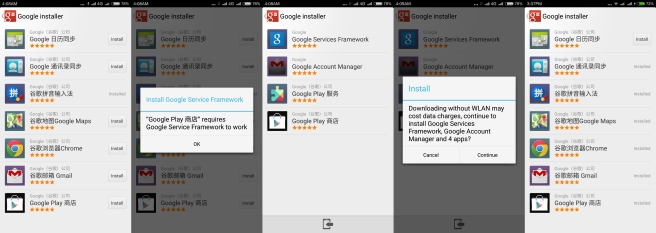
5. Install the “Google Play” and follow thru’ as in the above image. It will then install, Google Service Framework, Google Account Manager, Google Play services and other Google apps. I install most of the apps like Google Maps, Google Chrome browser and of course the Google Contacts Sync to be able to sync all your contacts or else it will not synchronize automatically.
6. Now your Redmi Note 2 is now all set with all the Google apps and services.
FOR MORE DETAILS ON UPDATING YOUR ROM, READ MY THREAD and click the link below:-
Disclaimers
I will not be responsible for any harm, damage, that may occur to your device through the use of this tutorial. Please do not post, mirror, or take credit for this tutorial or any related work without explicit permission.
© 2015 Felix Senada. All rights reserved.


Comments
Post a Comment