Galaxy A series is the end of the Samsung models for young users, which combines elements of metal and glass, representing Samsung from plastic to metal materials comprehensive transformation. After 2015 and 2016, the third generation of the 2017 edition will come. Now, Samsung A series are 5 models, respectively, A3, A5, A7, A8, and A9.

With the A series is more and more popular, the user may encounter problems also emerge in endlessly. In addition to the hardware problems, I mainly want to talk about a problem. This problem is almost all mobile phone users will encounter. When we accidentally deleted the phone data and these data is important, how do we do? For example, I deleted the audio in A7, how can I recover?
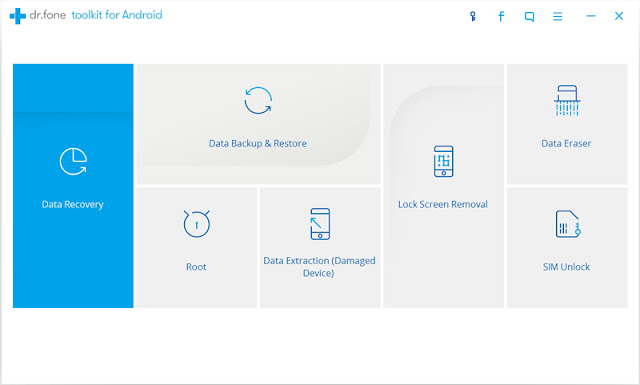
You can use Samsung Data Recovery. This is a practical data processing tools. It can help you to solve the problem of data recovery, such as your phone password forgot and can’t use, your data is lost due to system upgrades, phone system crashes and lead to the loss of data, or the most simple, you accidentally delete phone data. Some of these problems are very complex, and some are very simple, but it is not a problem for Android Data Recovery. And the software can now be applied to more than 6 thousand Android devices, almost all of the Android devices on the market it can be compatible with.


Method to Recover Deleted Audio from Samsung A3/A5/A7/A8/A9:
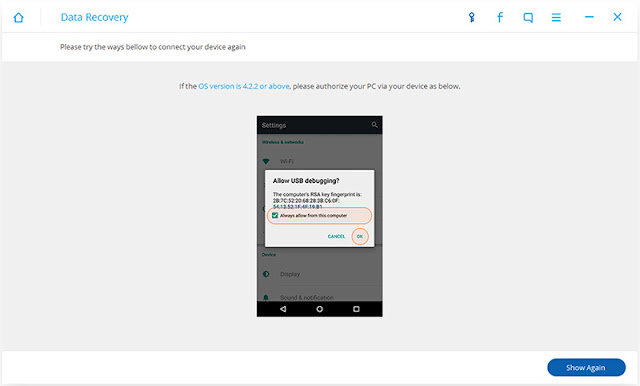
Step 1. First, run Android Data Recovery to your computer, and then connect your Samsung phone to the computer with USB line. Next, the program will pop up a window; you need to open the USB debugging on your phone. You need to do it manually, and you can continue to use the software when you do this.
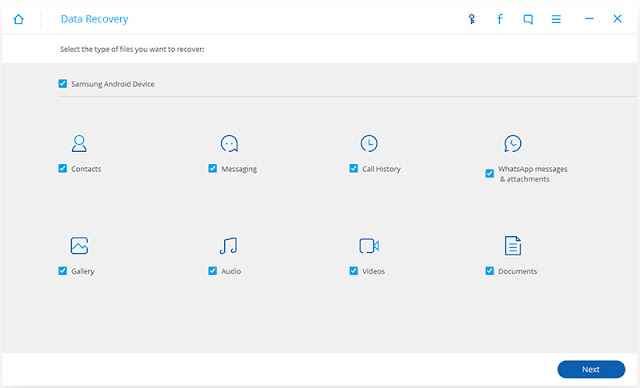
Step 2. Then, the program will enter the next interface, it will pop up a window, you need to select the type of data. If you only need to restore the deleted audio, you can only check the "Audio", and then click "Next".
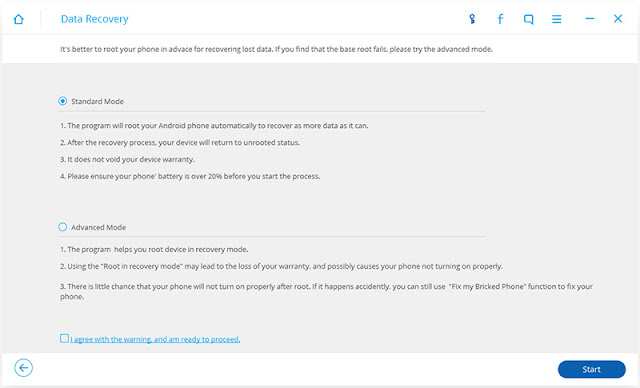
Step 3. Next, you need to select the scan mode for your data. Program will provide you with two modes, one is the standard mode, and the other is the advanced mode. And I recommended standard mode, because this mode is faster. After the selection is complete, click “Start".
Note: There might be a Superuser authorization appearing on your device during the scan. If you get it, click "Allow" to confirm it. If not, just forget it.
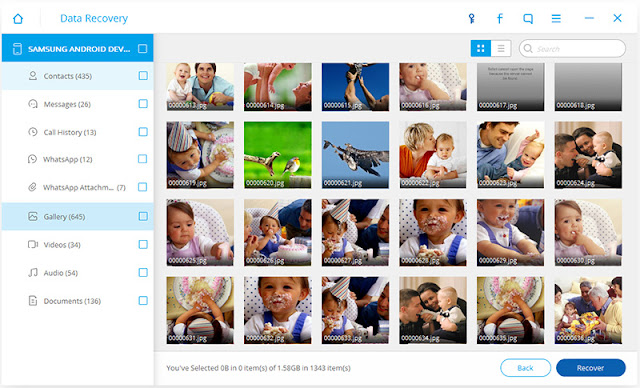
Step 4. Next, the program will automatically scan your phone data. When the scan is over, you can preview the data after the scan. You can turn on the button of "Display deleted files only" to separate them if you only need to recover the deleted audio. Finally, check the items you want and click "Recover" to save them all on your computer.
Related article:
Recover Deleted Photos from Samsung Galaxy A3/A5

You can use Samsung Data Recovery. This is a practical data processing tools. It can help you to solve the problem of data recovery, such as your phone password forgot and can’t use, your data is lost due to system upgrades, phone system crashes and lead to the loss of data, or the most simple, you accidentally delete phone data. Some of these problems are very complex, and some are very simple, but it is not a problem for Android Data Recovery. And the software can now be applied to more than 6 thousand Android devices, almost all of the Android devices on the market it can be compatible with.
Method to Recover Deleted Audio from Samsung A3/A5/A7/A8/A9:
Step 1. First, run Android Data Recovery to your computer, and then connect your Samsung phone to the computer with USB line. Next, the program will pop up a window; you need to open the USB debugging on your phone. You need to do it manually, and you can continue to use the software when you do this.


Step 2. Then, the program will enter the next interface, it will pop up a window, you need to select the type of data. If you only need to restore the deleted audio, you can only check the "Audio", and then click "Next".

Step 3. Next, you need to select the scan mode for your data. Program will provide you with two modes, one is the standard mode, and the other is the advanced mode. And I recommended standard mode, because this mode is faster. After the selection is complete, click “Start".

Note: There might be a Superuser authorization appearing on your device during the scan. If you get it, click "Allow" to confirm it. If not, just forget it.
Step 4. Next, the program will automatically scan your phone data. When the scan is over, you can preview the data after the scan. You can turn on the button of "Display deleted files only" to separate them if you only need to recover the deleted audio. Finally, check the items you want and click "Recover" to save them all on your computer.

Related article:
Recover Deleted Photos from Samsung Galaxy A3/A5
Comments
Post a Comment